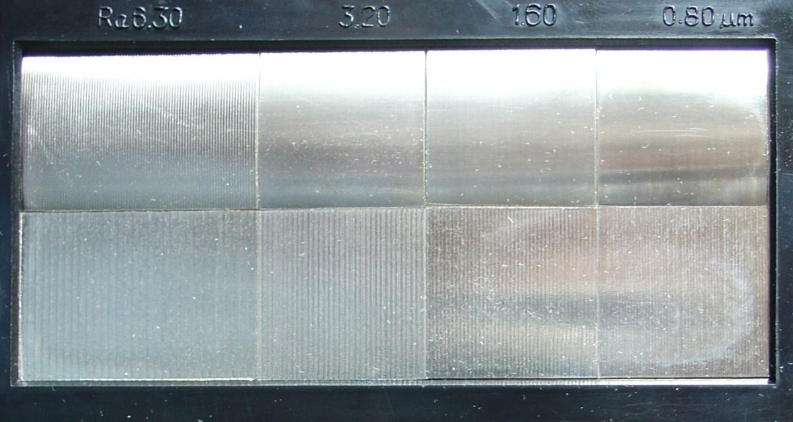
The choice of surface finish for CNC machining depends on the application, material, machining method, and cost of your part. You can use roughness comparison boards to differentiate the roughness of CNC machined surfaces. A roughness comparison plate is a tool for testing surface roughness and it is available in different grades from 0.05 to 25 microns. You can compare the comparison plate to the CNC machined part surface to find the closest grade. Alternatively, you can use a roughness gauge to measure the roughness of a CNC machined surface. A roughness meter is an instrument used to measure differences in surface height, which can give a numerical parameter such as Ra. Ra is an abbreviation for Average Surface Height, which is a commonly used indicator of surface roughness.
Category for Surface Roughness Comparison Samples
According to different processing methods, the surface roughness comparison samples can be divided into the following categories:
– Machining comparative samples: These samples are machined, such as milling, turning, grinding, etc., which can demonstrate the surface roughness characteristics under different machining processes.
– Precision machining comparison samples: These samples achieve very high smoothness on the surface through high-precision processing methods, such as grinding, polishing, electropolishing, etc., and are used to compare and evaluate the roughness of other samples.
-Chemical treatment comparison samples: These samples undergo specific chemical treatment methods, such as pickling, electroplating, etc., which can change the surface morphology and roughness, and are used to compare the effects of different treatment conditions.
-Surface coating comparison samples: These samples are formed by surface coating techniques, such as spraying, plating, etc., to form different types of coatings, which are used to compare and evaluate the impact of different coatings on surface roughness.
Method for Surface Roughness Comparison Samples
Surface roughness comparison samples can be divided into two types according to different detection methods: comparative method and online method.
– The comparative method refers to the use of a surface roughness sample produced by equipment or a process for comparison with a surface of known roughness parameters. The comparative method can utilize tactile and visual perception to evaluate surface roughness.
-Online method refers to the use of some instruments or sensors to measure surface roughness, such as inductance, capacitance, optics, etc. The online method can obtain the numerical parameters of surface roughness in real-time, such as Ra, Rz, Rq, etc.
Surface roughness comparison between turning and planing

The comparison of surface roughness between turning and planning can be carried out from the following aspects:
– Theoretical models: Theoretical models for turning and planing surface roughness are based on the geometric relationship between cutting parameters (feed, depth of cut, etc.) and tool parameters (tool nose radius, etc.). Theoretical models can be used to predict and analyze the variation law of surface roughness.
– Experimental measurement: The experimental measurement of turning and planing surface roughness can use different instruments or methods, such as a profilometer, inductance method, regression analysis method, neural network method, etc. Experimental measurements can be used to verify and evaluate the actual value and performance of surface roughness.
– Comparative samples: Comparative samples for turning and planing surface roughness are some surfaces with known roughness parameters produced by different processes, such as casting, conventional machining, cylindrical grinding, turning, EDM, shot peening, etc. Comparative samples can be used to compare the surface roughness of different processes through tactile and visual perception.
How to compare the roughness of boring and grinding
The comparison of boring and grinding roughness can be carried out from the following aspects:
– Numerical parameters: The numerical parameters of boring and grinding roughness refer to using some quantitative indicators to describe the geometric characteristics of the surface, such as Ra, Rz, Rq, etc. Different processing techniques and conditions will result in different numerical parameters. For example, the machining accuracy of fine boring can reach IT76, and the surface roughness is Ra0.630.08 micron; while the surface roughness of grinding is generally Ra0.32~0.16 micron.
– Comparative samples: Comparative samples for boring and grinding roughness are some surfaces with known roughness parameters produced by different processes, such as casting, turning, planing, boring, EDM, shot peening, etc. Comparative samples can be used to compare the surface roughness of different processes through tactile and visual perception.
-Influencing factors: The influencing factors of boring and grinding roughness refer to some variables related to processing technology, conditions, materials, etc., such as cutting speed, feed rate, tool material, tool shape, tool wear, lubricant, etc. Influencing factors can be used to analyze and optimize the variation law and performance of surface roughness.